
*UPDATE!!!! I HAVE HAD SEVERAL COMMENTS AND EMAILS ABOUT THERE BEING NO TEXT SHOWING UP IN THE BOX. I HAVE TESTED THIS CODE AND HAVE HAD NO ISSUES MYSELF, BUT IT SEEMS TO BE PRETTY COMMON. BLOGGER HAS CHANGED IT'S INTERFACE IN SOME PARTS SO THAT MAY HAVE SOMETHING TO DO WITH IT, HOWEVER; BECAUSE IT IS WORKING FOR ME, I CAN'T SEEM TO FIND A RESOLUTION. IF ANYONE KNOWS HOW TO REMEDY THIS SO THAT I CAN FIX THIS POST TO REFLECT THE MOST CURRENT CODE OR WAY TO INSTALL THE CODE, PLEASE LET ME KNOW! I AM SO SORRY FOR ANY INCONVENIENCE AND I WISH I COULD FIND A WAY TO RESOLVE THIS MYSELF! THANK YOU ALL FOR YOUR PATIENCE!!! XOXOXOXO - ASHLEY*
It's really quite easy to create a button so I'm going to show you how with these easy steps and, dare I say, easy coding?! {There are a lot of steps, but its really easy. I promise!}
1. Choose an image for your button.
2. Go to picmonkey.com and click on 'edit a photo'. Select the image that you want.

3. Resize the image. We are going to resize mine to 200x200. Be sure to uncheck 'keep proportions'.


4. Decorate your button! Add text and designs if you'd like. Picmonkey has some great options for you so have fun with it.

5. Save the photo. Be sure to name it so you can recognize it and save it in a place you can find it. I saved mine as buttonme! to the desktop.
6. Head on over to flickr.com. It's free to sign up if you don't have an account. Upload your image.

7. Click on your uploaded image and then click on the 'actions' tab. Scroll down to 'view all sizes' and click on that.


8. There will be options of different sizes when you reach that page, but keep on the 200x200 size. Right click your image and click on 'open in new tab' {or open in new window}. The URL here is your image URL.

9. Keep the image open in the tab or window and head on over Blogger.
Now, you have two options for the button. You can either make a grab box for your sidebar so bloggers can grab your button to display on their blog or you can create a code to send them so they can display it on their blog. I am going to show you how to do both! Be sure to keep your image open in the new tab or window for both options.
GRAB BOX OPTION FOR YOUR SIDEBAR
1. Click on 'template' then select 'add a gadget'. You are going to want the HTML/Java option.

This is the code you are going to want to paste in the HTML/Java gadget:
<div align="center"> <a href="YOUR BLOG URL HERE" target="_blank"><img alt="YOUR BLOG TITLE" src="YOUR IMAGE LINK HERE"/></a> </div> <div align="center"> <form><textarea rows="6" cols="20"><center><a href="YOUR BLOG URL HERE" target="_blank"><img alt="YOUR BLOG TITLE" src="YOUR IMAGE LINK HERE"/></a></center></textarea></form> </div>

2. Where it says 'your blog url here' {in red} enter in your blogs web address being sure to stay within the quotation marks. Where it says 'your blog title here' {in red} enter the name of your blog. Repeat that for the second part of the code.
3. Click on the tab or window that has your image link and copy the link. You're going to paste that link where it says 'your image link here' {in red}. Be sure to do it in the second part of the code too. There should be no red left and it should look like this {only with your info}:
<div align="center"> <a href="http://chevronstitches.blogspot.com" target="_blank"><img alt="Chevron Stitches" src="http://farm9.staticflickr.com/8043/8369116862_70e88221e1_m.jpg"/></a> </div> <div align="center"> <form><textarea rows="6" cols="20"><center><a href="http://chevronstitches.blogspot.com" target="_blank"><img alt="Chevron Stitches" src="http://farm9.staticflickr.com/8043/8369116862_70e88221e1_m.jpg"/></a></center></textarea></form> </div>
4. Click save and your button {with grab box} should be there!

OTHER OPTION {that will keep your button dimensions customizable if you prefer a size other than 200x200!}
1. Open a text document or add a note to your dashboard for Mac users
2. Copy and paste this code:
<a href="YOUR BLOG URL HERE" target="_blank"><img src="YOUR IMAGE URL HERE" alt="BLOG TITLE" width="200" height="200" /></a>
3. Replace the information in red just as you did above. Make sure to stay within the quotations when replacing the info. The 'width' and 'height' in green should be changed to your button size. We are working with a 200x200 button size.
Your code should look like this {only with your info}:
<a href="http://chevronstitches.blogspot.com" target='_blank"><img src="http://farm9.staticflickr.com/8043/8369116862_70e88221e1_m.jpg" alt="Chevron Stitches' width="200" height="200" /></a>"/>
Save it and now it is ready to give to those bloggers that have been asking to swap buttons with you!
Here are some tips in making your button:
Select an image that represents you and your blog. You can either choose a picture of yourself or you can choose a picture of something you blog about. Blog about sewing related items? Take a picture of your sewing station and use that. Blog about vintage stuff? Take a photo of vintage stuff! Just be sure it represents you and not someone or something else.
Use your own image! Unless you have permission from the original source of a picture, only use your own image! Take a picture, draw a picture, or just use text. Just make sure its your own!
When selecting an image, keep in mind that you're going to resize it. Use a photo that will look good small and also will look good resized. You don't want a photo that will be smooshed when resized or pixelated if the photo is originally smaller than the resize. It should be crisp and clean after you resize it.
There are dozens of different button sizes that bloggers use. They want to make sure that they're sidebar is cohesive so they may require a button to be something other than 200x200. Here is a list of general button sizes:
-125x125
-150x150
-200x200
-250x250
-150x100
-200x100
-300x200
-300x250
-150x600
{Those are the sizes you will choose when you first resize your photo in Picmonkey, then again when you enter it into the SECOND code. It all depends on whose blog your button will be displayed on}
Have fun and be creative. Picmonkey has lots of fun little options to utilize, but be sure to keep it simple. It's a small image and you don't want to make it too busy and unreadable. This button is going to be displayed on other blogs as a form of advertisement - you don't want to have bad advertisement that no one can read! I suggest if you're using a picture to use a couple or one small elements {like I did with the chevron arrows} and your blog name. Use font that is legible and white is almost always the best color to use.
You might want to make a few different ones. Stay within your style of course, but remember that bloggers who want to display your button have certain tastes and styles for their blogs as well. You may blog about DIY/Crafts and have a cutesy button with sewing supplies and bright colors in the background, but a lifestyle blogger wants to swap and is looking for something with more of a vintagey feel to go with the flow of their blog. This gives you the opportunity to have something made and appealing to not just you, but your readers and bloggy friends too. Its also fun to change out your buttons with the seasons!
Remember to always save your button codes in a document or you can save them in a draft on Blogger. Just don't publish it! Title it something like 'BLOG BUTTON - DO NOT PUBLISH'. You can adjust the title of the draft to something more specific as to what that button looks like if you plan on having more than one button in your drafts.
---
If you have any questions at all about making the button or about this tutorial, please leave me a comment or you can send me an email.
If you're still like, ehhhhh... what? Send me an email at willow.little {at} gmail {dot} com and I would be happy to make a button for you with either or both options! For FREE!
If you would like to swap buttons with me, you can head on over to my Sponsor page and follow the prompt. You can also purchase larger ad space at very affordable rates.
I have four buttons to choose from on my sidebar so feel free to grab a button. Let me know you're displaying it so I can give you a shout out!
If you made a button using this tutorial, let me know! I'd love to check it out. I get blog button envy sometimes with how awesome everyone's buttons are!
*The grab box code only works on Blogger. Wordpress won't show the grab box.
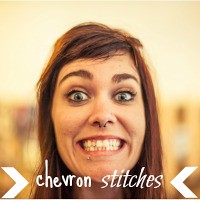 {this button and the photos in this post were used making Picmonkey!}
2. Go to picmonkey.com and click on 'edit a photo'. Select the image that you want.

3. Resize the image. We are going to resize mine to 200x200. Be sure to uncheck 'keep proportions'.


4. Decorate your button! Add text and designs if you'd like. Picmonkey has some great options for you so have fun with it.

5. Save the photo. Be sure to name it so you can recognize it and save it in a place you can find it. I saved mine as buttonme! to the desktop.
6. Head on over to flickr.com. It's free to sign up if you don't have an account. Upload your image.

7. Click on your uploaded image and then click on the 'actions' tab. Scroll down to 'view all sizes' and click on that.


8. There will be options of different sizes when you reach that page, but keep on the 200x200 size. Right click your image and click on 'open in new tab' {or open in new window}. The URL here is your image URL.

9. Keep the image open in the tab or window and head on over Blogger.
Now, you have two options for the button. You can either make a grab box for your sidebar so bloggers can grab your button to display on their blog or you can create a code to send them so they can display it on their blog. I am going to show you how to do both! Be sure to keep your image open in the new tab or window for both options.
GRAB BOX OPTION FOR YOUR SIDEBAR
1. Click on 'template' then select 'add a gadget'. You are going to want the HTML/Java option.

This is the code you are going to want to paste in the HTML/Java gadget:
<div align="center"> <a href="YOUR BLOG URL HERE" target="_blank"><img alt="YOUR BLOG TITLE" src="YOUR IMAGE LINK HERE"/></a> </div> <div align="center"> <form><textarea rows="6" cols="20"><center><a href="YOUR BLOG URL HERE" target="_blank"><img alt="YOUR BLOG TITLE" src="YOUR IMAGE LINK HERE"/></a></center></textarea></form> </div>

2. Where it says 'your blog url here' {in red} enter in your blogs web address being sure to stay within the quotation marks. Where it says 'your blog title here' {in red} enter the name of your blog. Repeat that for the second part of the code.
3. Click on the tab or window that has your image link and copy the link. You're going to paste that link where it says 'your image link here' {in red}. Be sure to do it in the second part of the code too. There should be no red left and it should look like this {only with your info}:
<div align="center"> <a href="http://chevronstitches.blogspot.com" target="_blank"><img alt="Chevron Stitches" src="http://farm9.staticflickr.com/8043/8369116862_70e88221e1_m.jpg"/></a> </div> <div align="center"> <form><textarea rows="6" cols="20"><center><a href="http://chevronstitches.blogspot.com" target="_blank"><img alt="Chevron Stitches" src="http://farm9.staticflickr.com/8043/8369116862_70e88221e1_m.jpg"/></a></center></textarea></form> </div>
4. Click save and your button {with grab box} should be there!

OTHER OPTION {that will keep your button dimensions customizable if you prefer a size other than 200x200!}
1. Open a text document or add a note to your dashboard for Mac users
2. Copy and paste this code:
<a href="YOUR BLOG URL HERE" target="_blank"><img src="YOUR IMAGE URL HERE" alt="BLOG TITLE" width="200" height="200" /></a>
3. Replace the information in red just as you did above. Make sure to stay within the quotations when replacing the info. The 'width' and 'height' in green should be changed to your button size. We are working with a 200x200 button size.
Your code should look like this {only with your info}:
<a href="http://chevronstitches.blogspot.com" target='_blank"><img src="http://farm9.staticflickr.com/8043/8369116862_70e88221e1_m.jpg" alt="Chevron Stitches' width="200" height="200" /></a>"/>
Save it and now it is ready to give to those bloggers that have been asking to swap buttons with you!
Here are some tips in making your button:
Select an image that represents you and your blog. You can either choose a picture of yourself or you can choose a picture of something you blog about. Blog about sewing related items? Take a picture of your sewing station and use that. Blog about vintage stuff? Take a photo of vintage stuff! Just be sure it represents you and not someone or something else.
Use your own image! Unless you have permission from the original source of a picture, only use your own image! Take a picture, draw a picture, or just use text. Just make sure its your own!
When selecting an image, keep in mind that you're going to resize it. Use a photo that will look good small and also will look good resized. You don't want a photo that will be smooshed when resized or pixelated if the photo is originally smaller than the resize. It should be crisp and clean after you resize it.
There are dozens of different button sizes that bloggers use. They want to make sure that they're sidebar is cohesive so they may require a button to be something other than 200x200. Here is a list of general button sizes:
-125x125
-150x150
-200x200
-250x250
-150x100
-200x100
-300x200
-300x250
-150x600
{Those are the sizes you will choose when you first resize your photo in Picmonkey, then again when you enter it into the SECOND code. It all depends on whose blog your button will be displayed on}
Have fun and be creative. Picmonkey has lots of fun little options to utilize, but be sure to keep it simple. It's a small image and you don't want to make it too busy and unreadable. This button is going to be displayed on other blogs as a form of advertisement - you don't want to have bad advertisement that no one can read! I suggest if you're using a picture to use a couple or one small elements {like I did with the chevron arrows} and your blog name. Use font that is legible and white is almost always the best color to use.
You might want to make a few different ones. Stay within your style of course, but remember that bloggers who want to display your button have certain tastes and styles for their blogs as well. You may blog about DIY/Crafts and have a cutesy button with sewing supplies and bright colors in the background, but a lifestyle blogger wants to swap and is looking for something with more of a vintagey feel to go with the flow of their blog. This gives you the opportunity to have something made and appealing to not just you, but your readers and bloggy friends too. Its also fun to change out your buttons with the seasons!
Remember to always save your button codes in a document or you can save them in a draft on Blogger. Just don't publish it! Title it something like 'BLOG BUTTON - DO NOT PUBLISH'. You can adjust the title of the draft to something more specific as to what that button looks like if you plan on having more than one button in your drafts.
---
If you have any questions at all about making the button or about this tutorial, please leave me a comment or you can send me an email.
If you're still like, ehhhhh... what? Send me an email at willow.little {at} gmail {dot} com and I would be happy to make a button for you with either or both options! For FREE!
If you would like to swap buttons with me, you can head on over to my Sponsor page and follow the prompt. You can also purchase larger ad space at very affordable rates.
I have four buttons to choose from on my sidebar so feel free to grab a button. Let me know you're displaying it so I can give you a shout out!
If you made a button using this tutorial, let me know! I'd love to check it out. I get blog button envy sometimes with how awesome everyone's buttons are!
*The grab box code only works on Blogger. Wordpress won't show the grab box.


What a great face! Thanks for the tutorial, I will definitely be trying this out! :)
ReplyDeletehttp://threeinchstitch.blogspot.com
Ha, yeah Im a little bit silly sometimes! Can't wait to see your new button{s}! XO
DeleteAlright, how do you do this in Wordpress? My button is linking to the image not to the site.
ReplyDeletePS I love this thank you!
Hey! Yeah, Wordpress is lame-o and won't let you do fancy things like put a grab box for your buttons anywhere. One of the reasons I switched to Blogger. Just updated the post to reflect that. Sorry! Xo
DeleteThank you so so so so much for dong this as I had absolutely no idea and so many tutorials suggest using photoshop which I don't have! Grrr!
ReplyDeleteJenni x
Bowsbanglesandbakes.blogspot.com
Thank you for doing this! I'm a complete idiot when it comes to things like this! I definitely used your tutorial, and it was so simple to follow! Except my button published at the top of my blog page? I'm scared I'll jack my stuff up, so if you have any idea how to remedy that, let me know! Otherwise, I'll just leave it haha Thank you again! You're super helpful!
ReplyDeleteDid you 'add a gadget' to your header or somewhere at the top of your layout instead of in your sidebar by chance?
DeleteYou are wonderful. This was a great tutorial and now my button is up for grabs!
ReplyDeleteThank you.
Ohhh, thank you for this! Bookmarking this page PRONTO!
ReplyDeletexoxo,
Gayle | Grace for Gayle
This was really super helpful. I have the computer literacy of a 2 year old and I finally got it. Thank you Ashley!
ReplyDeleteThis has helped me so much! This was the easiest tutorial on this! Thanks :)
ReplyDeletexxxxx
I've been trying all different codes all afternoon and as soon as I tried yours, it worked! Thank you!
ReplyDeletehttp://fieldsofautumnleaves.tumblr.com
thanks for the tutorial. i needed it. there should be more of these on various things for newbies like me. I say newbies but heck i've been blogging for 2 yrs and now just recently started using it more
ReplyDeleteWow finally a tutorial that makes sense! Thank you so much! I shared the link to this tutorial in my blog. Hope you don't mind!
ReplyDeleteaslanadventure.blogspot.com
Thank you so much for the tutorial! I tried many others, but yours is the only one that actually worked! I love your site too!
ReplyDeletecraftsgalaura.blogspot.com
Thanks so much! It linked!!
ReplyDeleteThanks for this. For some reason, when I published the button through the gadget, everything would show up but the code to cope. I played around with it for a bit and finally got it.
ReplyDeleteYou're a doll for posting this!
Lori
What did you do to get it to work?? It's like the code I input is deleting the second half after I save it, and no matter how many times I've re-entered it, it keeps doing the same thing. It's super frustrating. I even tried in chrome AND IE thinking maybe it was the browser, since I've had issues with that before. Nothing. :(
DeleteThank you for this, it is so helpful. Although, on my blog it shows the box but no text. None at all. If you guys look at it and see it, please let me know. I will leave it as is until the end of today (4/30). Thank you in advance.
ReplyDeleteMichelle
www.BigFootTribe.com
OK, I'm having the same issue as the above commenter. Everything worked beautifully, but there's no text in my grab box. :( I have no idea what I did wrong!
ReplyDeleteisabellaharper.author@gmail.com
I'm having the same issue as Michelle and Isabella. Any suggestions?
ReplyDeleteselenahaler@gmail.com
http://fourthgradefirsts.blogspot.com
Try uploading your pic into Photobucket. I did that instead of Flickr and it worked!
DeleteYes, me too--same as Michelle and Isabella and Selena--no text in grab box--(but thanks to you I now have an image :P )
ReplyDeleteSame problem as above - textbox there but no image or text! :(
ReplyDeleteSame issue as above! My code writing husband looked at it real quick, but I really wanted to do this one on my own. Any suggestions? He put it in some other html thing and it worked. Do you think it could be blogger?
ReplyDeleteOh, and great instructions! Thanks so much!!!
ReplyDeleteOkay, I think I have figured out what's wrong. I've been trying to make the text appear all day using different tutorials and the ONLY one that has worked was where the code was in the courier new font. All of the rest were in Times New Roman or Arial or something and none of them had the text. Maybe that will work for some people... :)
ReplyDeleteI'm having the same problem! I'm actually a little relieved to find this out, as I'm not very good at HTML and I was getting VERY frustrated!
ReplyDeleteAny solutions?
Natasha
A Modest Fashion Blog:
www.natashaatkerson.blogspot.com
I had the same problem and I uploaded my pic to Photobucket instead of Flickr. Don't know why that would cause a problem but hopefully that helps!
DeleteIf anyone is interested I have a solution for the problem!
ReplyDeleteHave a look on my blog and it has the answer :)
yasminaawrites.com
xx
Hey! Do you have the solution? I'm so glad I'm not the only one having the problem lol I've tried like 20 times maybe more haha!
DeleteHey there! Thanks for the tutorial! I created my button and grab box! You can find it here http://ellesprincessdiaries.blogspot.com/2013/06/music-mashup-linkup-come-participate.html ut it won't go live until 9:00 am on Thursday, June 13th! Thanks for the tutorial!
ReplyDeleteAlso, I had the same problem you mentioned and I just uploaded my pic into Photobucket instead of Flickr and it fixed it!
I uploaded my pic to Photobucket as well but my grab box still doesn't display a code. Does anyone know why this is?
Deletexo, Janiecy
http://janiecyxo.blogspot.ca/
Hey hun i didnt see this when i started building mine so i just have a quick question is it mandatory to have it those sizes, because mine is just a little off?
ReplyDeletehttp://pro-cosmetics.blogspot.ca/