Showing posts with label craft. Show all posts

Wednesday, March 20, 2013

DIY Garbage Disposal Fresheners

If you're using your garbage disposal as you should be then it wont take long before it gets a little stinky. But if you make these quick and easy little balls of freshness you can rid of the smell and have a fresh smelling disposal. With just a few ingredients [that you already have, I'm sure!] these can be whipped up in minutes.
[Note: these will need to dry out over night or all day]

Materials:

-baking soda
-salt
-lemon
-essential oil, any scent [optional. i used an orange scent]
-dish soap
-grater
-melon baller or spoon
-wax paper
-container
Procedure:
-Measure out 3/4 c. to 1 c. baking soda. Depending on how juicy your lemon is, I would start with 3/4 c. and add the rest if it's not the right consistency. Pour into mixing bowl.
-Measure 1/2 c. salt and add to baking soda
-Mix to make sure it isn't lumpy
-Grate lemon peel into the mixture
-Cut lemon in half and squeeze out all of the juice
-Measure 1 teaspoon dish soap and add to mixture
-Put a few drop of essential oil in [optional]
-Mix together until you get a coarse consistency, like wet sand. If it's too liquidy, add the other 1/4 c. baking soda. 
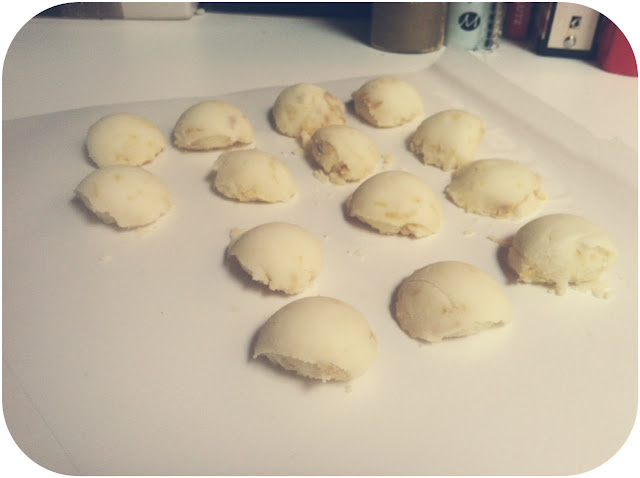
-Take your melon baller or spoon and scoop out little balls. Place them on a sheet of wax paper.
-Leave out over night or all day to dry
-Put them in a cute container and keep next to the sink or under the sink to save counter space.
When your disposal is smelling a little funky just drop one in and turn it on!


PostSig

Pin It!

Friday, March 1, 2013

Pinspiration Friday


This weeks Pinspiration is super functional! And much needed in the bathroom or your camping supplies! I saw this over at The Burlap Bag and knew I needed to put this craft under my belt. I changed it up, using the entire lid, which made it easier to stick the sand paper on. 


To make this you will need:

a mason jar with lid
stick on fine sandpaper {not super fine}
strike anywhere matches

Put the matches in the jar
Trace the lid on the back of the sandpaper and cut out
Stick on to lid
Put lid on

So easy!


PostSig

Pin It!

Friday, February 1, 2013

Pinspiration Friday


Happy Friday! How was everyone's week? Mine was super productive! I love weeks like that. It mostly has to do with blogging and some other awesome stuff that a bloggy friend and I are creating. I know, the suspense! You all will find out soon! Mostly because we are just SO EXCITED for this to happen and to get started and are becoming impatient! Soon. Soon.

Today I am sharing with you one of the first pins I had added to the Pinspiration Friday board months ago. I have been wanting to make it for the kids {mostly Bry right now} so we headed to Home Depot this week and got what we needed for it.

Here is the original Pinspiration:
{{Via}}
I took that concept and made it my own. I really wanted to use some big scraps of fabric I have had sitting for over a year now and found a pretty moss green piece screaming 'staple me, staple me!!'
In the original pin, she used duct tape, but I'm a cheapskate and all of the duct tape I have cost me a pretty penny so fabric was a much better option for me. My daughter and I took the fabric and stretched it around the board and stapled it.
I am not that good at this apparently, but it works. 


The dowel we had purchased for this purpose is a little too small so we need to head back and get a bigger dowel.


But Bry had fun trying to get herself balanced anyway. She has been on it for the past 30 minutes seeing how many times she can stay balanced and for how long. I wish everything entertained my kids this much all the time! Ha!

Do you have any Pinspirations brewing right now? Share with me!

Oh, and if you didn't know yet, I am hosting a Fabric Swap! Head on over to the post to read the rules and guidelines then email me to sign up! Going to be such a fun swap! 

PostSig

Pin It!

Thursday, January 31, 2013

The Chirping Moms Virtual Pinterest Night Party


Sunday night the lovely ladies Courtney & Julie over at The Chirping Moms hosted their very first virtual Pinterest Night! When I saw that they were doing this I immediately signed myself up, got all of the materials, and patiently awaited the arrival of 6pm Sunday evening. 

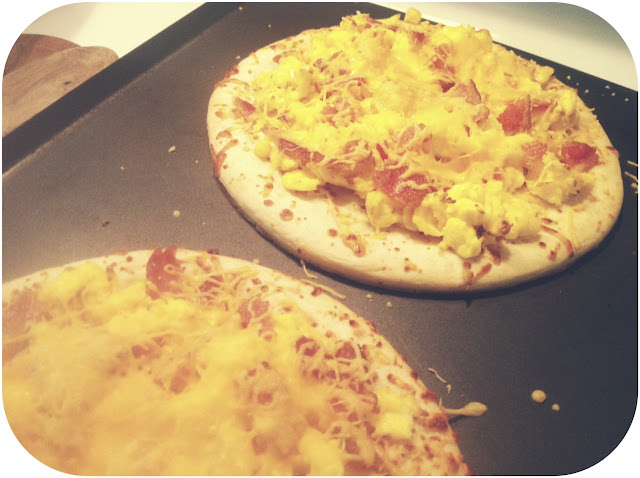
The crafts consisted of a heart garland, Valentine lotto scratchers, and taco pizza. I changed up my night a little bit to fit what would work best for me so I ended up making a mini heart garland that was machine sewn and a breakfast pizza in leu of the taco pizza {so that the entire family could enjoy it}. Here are some snippets from my night:


Did you participate in the virtual Pinterest Night? Share with me below! 

PostSig

Pin It!

Friday, December 14, 2012

Pinspiration Friday

Hello! Happy Friday! Hope you all had a lovely week. I sure did! I got caught up and delivered all of my custom orders, mailed out an Etsy order, got my print out for the print swap Im participating in, and mailed off the ten birthday 'thank you' gifts for some followers! Now I will spend the weekend catching up on housework and starting on a project just for myself. And, surprise surprise, the fabric had chevron arrows on it! Ok, so now onto this weeks Pinspiration!

I found this pin via someone I was following and pinned it to two of my boards: diy/crafts and Pinspiration Friday. I knew right away that it was not only a project I wanted to complete, but also one I wanted to share with all of you. 

The original pin is from the Metric Child. You should check out her blog.. it is super cool! 


Ahhh, see? Aren't those radical? 

I got the bobby pins at the dollar store {I used the extra long ones for this project}, the earring hooks and wire at Michael's. For a total of $7 you can have these earrings! Oh, and you need nail polish, but before I even pinned this I had got some at the dollar store for a gradient nail effect a few weeks back. I'm sure you all have nail polish already. 


I'm definitely lovin' how these turned out. And I love how easy they are to make! The 
bobby pins I picked up had 72 total, which makes for 5 pairs if you use 7 pins each earring. What's cool about this project is you can do stripes like she did {I wanted stripes too} or you can do a chevron print or polka dots or whatever pattern and in whatever colors you like! 


Do you have a Pinspiration project? I'd love to see it! Link up with me below!


PostSig

Pin It!

Wednesday, December 5, 2012

DIY Bubble Solution

I'm slowly transitioning select posts over from the old blog and am going to do two diy posts a week until I am all caught up. My first diy post on Chevron Stitches is my absolute fave so far. Mostly because I got to do this with my kids and because well, who doesn't love bubbles?


Sometimes during the winter months when the chill outside keeps everyone inside it's a little hard to keep the kiddos entertained. But I have something you all can make together that will keep them entertained for hours...
Bubble solution, wands, and blowers!
Take a peek inside your cupboards and pull out:
-measuring cup
-light corn syrup
-liquid dish soap
-bottle or container {with a lid} to hold the bubble solution
-pipe cleaners {in your favorite colors!}
-straws
-decorative tape
-mixing bowl
-wire whisk or spoon
To make the solution:
Pour 2 1/2 cups of hot water into bowl
Pour in 1/2 cup of corn syrup and stir or whisk well until corn syrup is dissolved
Slowly pour in 1/2 cup liquid dish soap and stir or whisk well
Pour solution into bottle or container
Let solution cool for a few hours before use
To make wands & blowers:
With pipe cleaners:
Take pipe cleaner and shape the top into a circle, wrapping the end around the stem of the cleaner. I used three different size washi tape rolls to get the circle shape. You could also use different shaped cookie cutters to shape your pipe cleaners around.
With straws:
Take three or four straws and bundle them together
Wrap washi tape around each end of the straws to hold in place
I added a cute label to the jar of bubbles
And you’re done! Grab your bubble solution, wand and blowers and head outside with the kiddos to fill the skies with bubbles. Or you can shove them out the door and get your chores done. But blowing bubbles is much too fun to pass up.

PostSig

Pin It!